Label Maker:四个命令行教你如何生成卫星影像图机器学习训练数据集

This is Chinese version, if you have not seen the blog (in English) yet, go here: https://developmentseed.org/blog/2018/01/11/label-maker/

Label Maker is a python library to help in extracting insight from satellite imagery. Label Maker creates machine-learning-ready training data for most popular ML frameworks, including Keras, TensorFlow, and MXNet. It pulls data from OpenStreetMap and combines that with imagery sources like Mapbox or Digital Globe to create a single file for use in training machine learning algorithms.

简介:

Label Maker 是我们最近开发的开源python软件包,帮助大家更好更深刻的理解卫星影像。Label Maker 可以生成可连接到任何你喜爱的机器学习(或深度学习),比如目前最流行的谷歌TensorFlow, MXNet,用Keras来编程毫无障碍。我们的软件包从 OpenStreetMap 和Mapbox 或者Digital Globe 上面获取数据,生成训练数据集。如果有同学写出可以链接到起他卫星影像数据源上,我们也非常欢迎大家修改和提交程序到我们的GitHub repo上面。另外,如果你想学习如何做对象检测(object detection)或者影像分类(image classification)我们也给大家准备了各种例子,欢迎使用欢迎留言反馈呀。

下面是正文啦!

ob_tf_result_fig1

机器学习和深度学习算法在计算机视觉上的应用日新月异。传统的卫星影像解译非常快速也方便,比如大家可以用ERDAS,ArcGIS等做。但是这些传统的方法也有一个局限,那就是如果你的卫星影像图分辨率高一点,图片大一点了,通常这些应用软件和你的台式电脑可能就跑不动了。要快速有效的解决这些问题怎么办?我今天就来回答这个问题,我们如何借助现在的GPU和机器学习来大规模的处理和解译卫星影像。

先来小小的了解一下,现在计算机视觉里面的深度学习大概可以分为三大类:监督学习,非监督学习和强度递归学习(最后这个不知道咋翻译)。卫星图像解译传统的方法也有监督学习和非监督学习。监督学习可以理解为:你告诉帮你做图像解译的软件:河流,海洋,森林看起来是啥样子的,然后软件就根据你给的阈值去计算和分类。非监督学习就是你不告诉软件,软件根据给定的卫星影像帮你分类,比如河流和海洋,从红、绿、蓝三个波段看起来就是不一样,所以软件可以根据两类不通的波段阈值将其分开。

深度学习也可以做监督学习和非监督学习。刚才也说了,有传统软件,为啥咱们还要用深度学习呢,是因为最近大家都在哈这个吗?no,no,no。。。

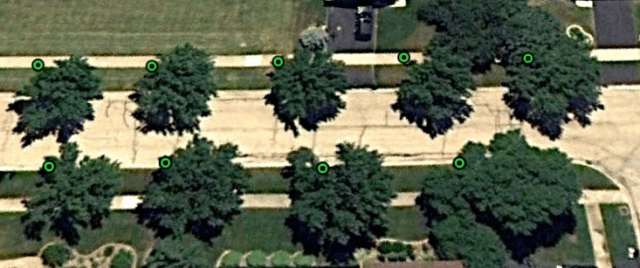
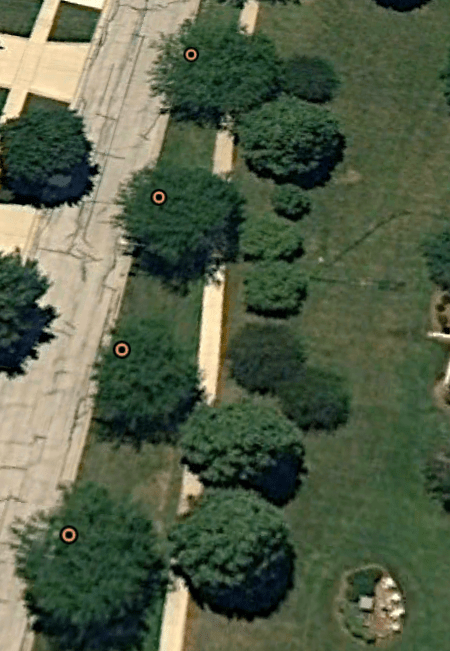
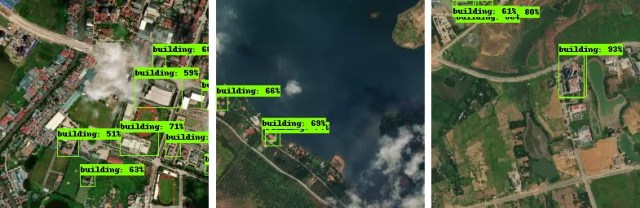
深度学习在卫星影响上出了可以通过大量使用GUP来加快计算之外,深度学习只要一次训练之后,可以利用训练好的模型权重(trained model weight)来反复训练未知的区域。你训练和学习的次数越多,时间越长,模型的表现就更好。这个链接大家可以看看我们用机器学习解译的道路网络。道路网络解译在卫星影像解译中是最难的,我先不告诉你,你自己来猜一猜下次我来公布答案。另外我们也做了很多类似的深度学习在卫星影响上的应用相关的例子,比如找房子就用到了TensorFlow对象检测利用MXNet和亚马逊SageMaker来做的分类模型另外一个利用Keras和亚马逊云计算机分类模型。

废话说了那么多,照着现在深度学习发展的速度,开发新的算法其事不算太难。难的是怎么准备机器学习和深度学习可以使用训练数据集。

我今天隆重的来给大家介绍一下我们的pytho 软件包Label Maker。Label Maker是个开源的软件所以在github上面大家随意给我们点赞和folk,我们也鼓励大家踊跃贡献。Label Maker通过获取Mapbox的卫星影像和OpenStreetMap的矢量数据(比如道路,房子,树林)等等,打包和生成训练数据。大家可以把这个数据链接到自己最喜爱的省督学习和机器学习上面。Label Maker模型只需要五个命令行就帮你生成训练数据集了哦。

只要 pip install label_maker之后,跑这四行命令行就可以了。

label-maker download         # download OpenStreetMap QA Tiles
label-maker labels           # create your ground-truth labels
label-maker images           # download satellite imagery tiles
label-maker package          # package tiles and labels into data.npz

当然我省略了两小个步骤:

比如要从Mapbox上下载卫星影像图片,你要有一个他们影像API的token,所以去注册一个Mapbox的账号吧。

然后使用上面的四个命令行之前,要生成一个配置文件(configure file),先这样的:


{
  "country": "vietnam",
  "bounding_box": [105.42,20.75,106.41,21.53],
  "zoom": 17,
  "classes": [
    { "name": "Buildings", "filter": ["has", "building"] }
  ],
  "imagery": "http://a.tiles.mapbox.com/v4/mapbox.satellite/{z}/{x}/{y}.jpg?access_token=ACCESS_TOKEN",
  "background_ratio": 1,
  "ml_type": "classification"
}

我们的python软件包会读取配置文件里面的参数来生成你需要的训练数据集。记得在把配置文件中的ACCESS_TOKEN 替换成你mapbox上生成的token哟。

等上面四个命令行顺利跑完成之后,你就有了data.npz就可以跑你最爱的机器学习算法了。比如下面这样:


# the data, shuffled and split between train and test sets
npz = np.load('data.npz')
x_train = npz['x_train']
y_train = npz['y_train']
x_test = npz['x_test']
y_test = npz['y_test']

# define your model here, example usage in Keras
model = Sequential()
# ...
model.compile(...)

# train
model.fit(x_train, y_train, batch_size=16, epochs=50)
model.evaluate(x_test, y_test, batch_size=16)

想要了解更详细的信息不要忘了访问我们的GitHub请大家不令赐赞👍和✨吧。

Working with geospatial data on AWS Ubuntu

I’ve stumbled on different sorts of problems while working with geospatial data on the cloud machine. AWS EC2 and Ubuntu sometimes require different setups. This is a quick note for installing GDAL on Ubuntu and how to transfer data from your local machine to your cloud machine without using S3.

To install GDAL


sudo -i
sudo add-apt-repository -y ppa:ubuntugis/ubuntugis-unstable
sudo apt update
sudo apt upgrade # if you already have gdal 1.11 installed
sudo apt install gdal-bin python-gdal python3-gdal # if you don't have gdal 1.11 already installed

To transfer data (SFTP) from your local machine to AWS EC2, you could use FileZilla.

Another option is using S3 with Cyberduck

To set up the environment, please refer to this post and this video.

If you are interested in learning more about the tools, we have:

  • Geolambda that you can run few docker containers that provided to run geospatial analysis on the cloud;
  • If you are interested in applying machine learning to satellite imagery, we have a few tools: 1) Label Maker for training dataset generation; 2) looking-glass for building footprint segmentation; and 3) Pixel-Decoder for road network detection and segmentation.

Artificial intelligence on urban tree species identification 人工智能在市区树种识别上的应用

It doesn’t matter which part of the world you are living now,  very diverse tree species are planted around the urban area we live.  Trees in the urban areas have many functions, for example, trees provide habitats for wildlife, clean air and water, provide significant health and social benefits, and also improve property value too.  Wake up in a beautiful morning that birds are singing outside your apartment because you have many beautiful trees grow outside of your space. How awesome is that!

However, tree planting, survey, and species identification require an enormous amount of work that literally took generations and years of inputs and care. What if we could identify tree species from satellite imagery, how much faster and how well we could get tree species identified and also tell their geolocations as well.

A city has its own tree selection and planting plan, but homeowners have their own tree preference, which the identification work a bit complicated, though.

chicagoTrees

(Photo from Google Earth Pro June 2010 in Chicago area)

It’s hard to tell now how many tree species are planted in above image. But we could (zoom in and) tell these trees actually have a slightly different shape of tree crown, color, and texture. From here I only need to have a valid dataset basically tell me what tree I am looking at now, which is a tree survey and trees geolocation records from the city. I will be able to teach a computer to select similar features for the species I’m interested in identifying.

GreeAsh

These are Green Ash trees (I marked as green dots here).

LittleleafLiden.png

These are Littleleaf Linden, they are marked as orange dots.

Let me run a Caffe deep learning model (it’s one of the neural networks and also known as artificial intelligence model) for an image classification on these two species, and see if the computer could separate these two species from my training and test datasets.

Great news that the model could actually tell the differences between these two species. I run the model for 300 epochs (runs) from learning rate 0.01 to 0.001 on about 200 images for two species. 75% went to train the model and 25% for testing. The result is not bad that we have around 90% of accuracy (orange line) and less than 0.1 loss on the training dataset.

nvidia_d_modeltest

I threw a random test image to the model (a green ash screenshot in this case) and it tells the result.

test_trees2

I will be working on identifying other 20 trees species and their geolocations next time.

Let’s get some answer what trees are planted in Chicago area and how it related to the property value (an interesting question to ask), and also what ecological benefits and functions these tree are providing (leave this to urban ecologist if my cloud computer could identify the species)? Check my future work ;-).


Start your own Amazon Web Service instance for deep learning怎么样开始建一个你自己的亚马逊深度学习机器

I am back to my blogging life after awhile~ 好久没有写博客,我又回来了!


I’ve been working on image classification and segmentation quite a lot recently, and totally in love with GPU big data processing. If you wanna process data that at gigabyte (G) level data definitely look into start a GPU AWS instance 最近我的工作接触了很多图像分类,和图像分割的内容,感觉自己太爱gpu图像分析的世界:太神速了。如果你现在处理的数据已经达到G级别了,我觉得你还是应该开一个亚马逊的ami(亚马逊的深度学习平台/机器)

It is not free, though. You definitely would start with AWS free tier, but I normally use their g or p machines. For example, if I use g2.2 x large, I will be charged about $0.65 per hour.  for more information, go here. It charges by how much you use and if you are new to deep learning and just wanna run some case studies, I think it worths more than building your own GPU machine or buy a new pc with super GPU.

但是话说回来亚马逊的ami其实也不是免费的。我现在用的机器主要两种p和g。比如我现在一般用的是g2.2 x large,价格大概在0.65美金一个小时。更多的选择可以看这里。我觉得这个还是很有吸引力的,如果你只是想要跑几个学习案例的话,我觉得这个ami非常棒。总之还是比现在才在学习阶段,就买台有gpu的电脑或者建自己的gpu机器学习平台有用。

AWS_Charge

You should definitely do some research on: 在去开个亚马逊深度学习ami之前,我觉得大家该想想:

  1. What do you wanna do with the AWS machine? Do you wanna learn just some basic machine learning stuffs that you only need to process megabyte (?M) level csv/txt data file you could just use your personal computer. A personal computer is fast enough though days. 你想拿这个亚马逊深度学习平台来做什么?如果只是用来处理几兆几十兆的数据的话,那还是没有必要开一个,现在的个人电脑那么快完全可以处理这些数据了。
  2. As I mentioned above, if you wanna process images or data that above some certain level your personal computer could not handle. Think about how much you wanna spend on the data processing. Again, evaluate your situation, needs and do some research. 但是,如果你的数据量已经是在几百兆或者g级别的,当然还是很有必要开一个的。话说回来,还是应该做些调查研究加上考量自己的情况。

My needs for this personal AWS EC2 machine are: 我需要这个亚马逊ami深度学习平台,主要是想用来做:

  1. Processing big data set on neural network image classification and segmentation;图像分类和图像分割;
  2. A machine that has Tensorflow, Theano, Torch, Keras, and also Caffe installed. Tensorflow, Theano, Torch, and Caffe are deep learning ecosystem/environment. Keras is the python module that I use to build deep learning algorithm architecture.想这个ami机器上有我想用的几个深度学习框架,比如Tensorflow, Theano, Torch, and Caffe。还有如果有keras,python的一个构建深度学习/机器学习的包。

If you are thinking about doing the same things, this is a great blog to start your own AWS AMI Instance here or this one. They both have explicit instructions on how to star the instance.

如果你觉得我的博客还不是很清楚,这两个博客有非常好的步骤教你一步一步的开始怎么建一个亚马逊的深度学习ami机器。第一个博客和第二个

Second options of launching an AWS AMI with a jupyter notebook server without going through all the AWS web console. Using the following command line in your terminal:

startJupyterNotebookServer

Copy and paste the following command lines (CLI) from above figure.

# create security group
aws ec2 create-security-group –group-name JupyterSecurityGroup –description “My Jupyter security group”

# add security group rules
aws ec2 authorize-security-group-ingress –group-name JupyterSecurityGroup –protocol tcp –port 8888 —cidr 0.0.0.0/0
aws ec2 authorize-security-group-ingress –group-name JupyterSecurityGroup –protocol tcp –port 22 —cidr 0.0.0.0/0
aws ec2 authorize-security-group-ingress –group-name JupyterSecurityGroup –protocol tcp –port 443 —cidr 0.0.0.0/0

# launch instance
aws ec2 run-instances –image-id ami-41570b32 –count 1 –instance-type p2.xlarge –key-name <YOUR_KEY_NAME> –security-groups JupyterSecurityGroup

The next thing would be to configure your Jupyter Notebook Server:

cert

jupyter notebook –generate-config
key=$(python -c “from notebook.auth import passwd; print(passwd())”)

cd ~
mkdir certs
cd certs
certdir=$(pwd)
openssl req -x509 -nodes -days 365 –newkey rsa:1024 –keyout mycert.key -out mycert.pem

cd ~
sed -i “1 a\
c = get_config()\\
c.NotebookApp.certfile = u’$certdir/mycert.pem’\\
c.NotebookApp.keyfile = u’$certdir/mycert.key’\\
c.NotebookApp.ip = ‘*’\\
c.NotebookApp.open_browser = False\\
c.NotebookApp.password = u’$key’\\
c.NotebookApp.port = 8888″ .jupyter/jupyter_notebook_config.py

These CLI are to create your AWS AMI certificate for Jupyter Notebook server, and then you could run and test out if your jupyter notebook works, after seccessfully run above CLI.

screen -S jupyter
mkdir notebook
cd notebook
jupyter notebook

For more info you could see this blog for details.

If you wanna use Ubuntu AMI instead of Amazon AMI here is another good blog for setting up the jupyter notebook server on the machine

https://chrisalbon.com/jupyter/run_project_jupyter_on_amazon_ec2.html